Supercharge your entity definition - pt 1. State flows
Let’s be honest. Documentation is a great thing, but sometimes you just need to get your hands dirty and do some exercise, to actually understand the concept. That’s how I came up with the idea of this little blog post series.
You see, in Content Hub, in each entity definition, there are few switches ready to be enabled, and I have a weird impression they can be really useful. I had an occasion to work with one of them - the State Flows - and I would love to have an article which would describe every aspect of it. Hence, I’m going to write one about State Flows, but I want to also check what other switches do, to complete the series. It will cover what’s already in the documentation, but I’ll also include some information that I found out by trial and error.
Let’s go!
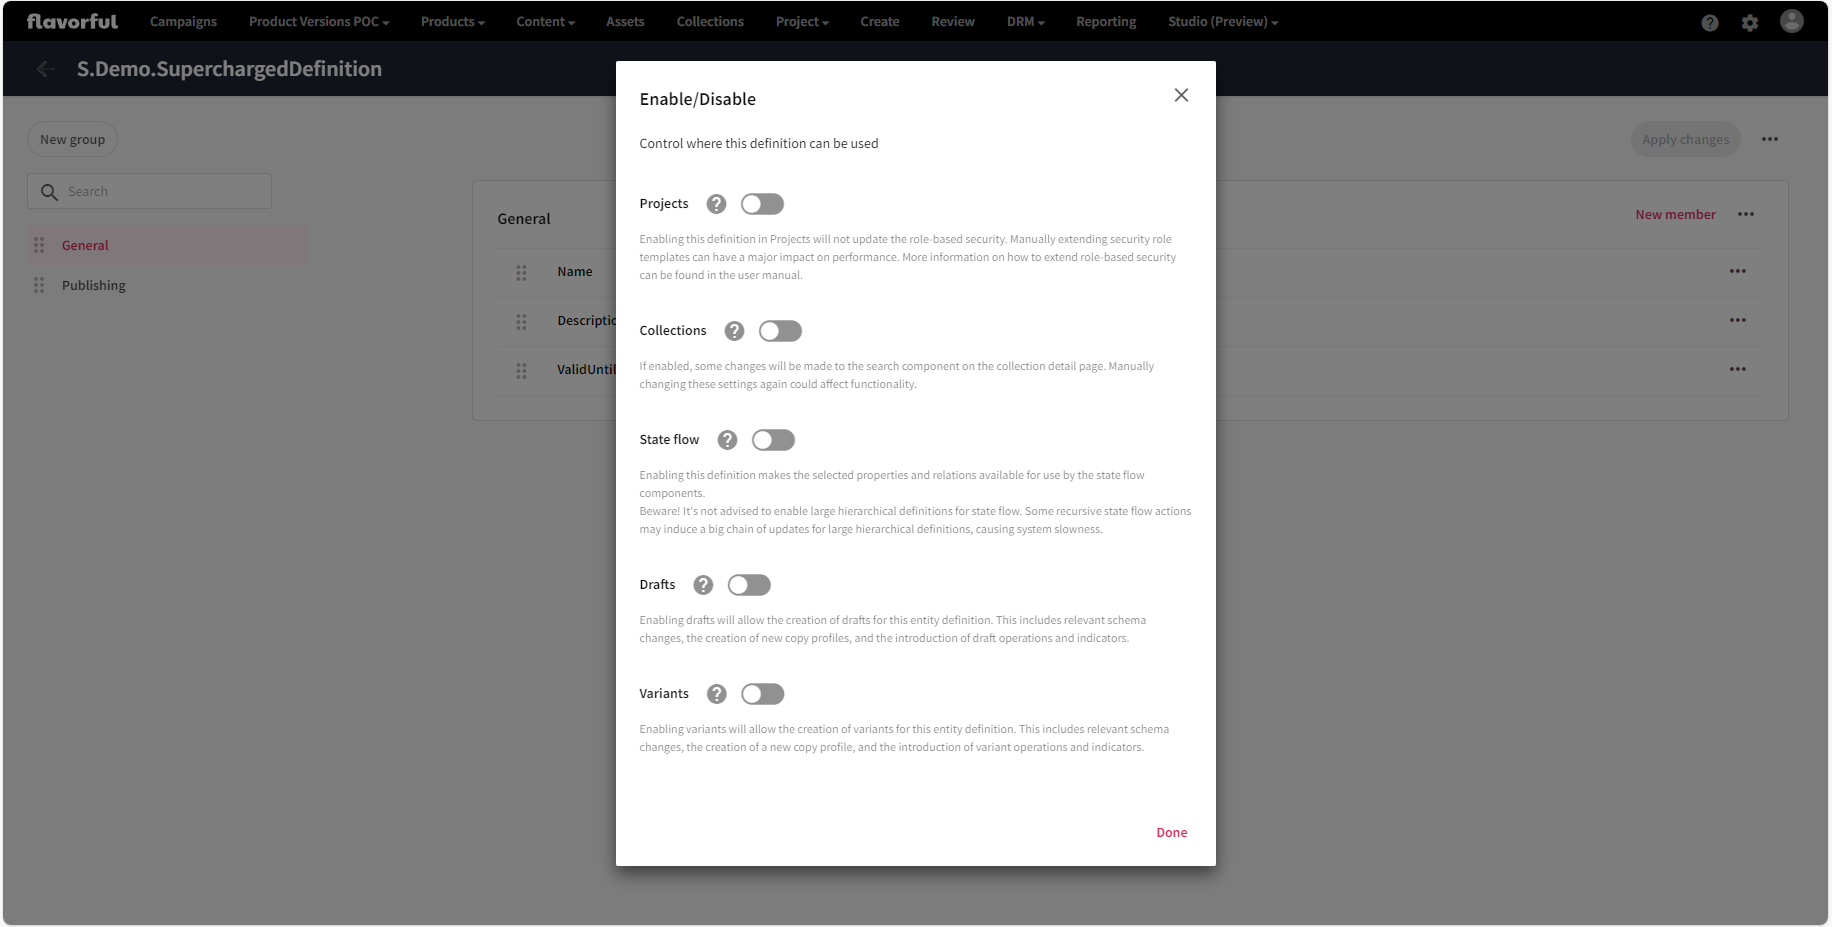
A bit of theory first. If you go to your entity definition, and expand three dots menu in the top right corner, you will find Enable/Disable option as shown on the picture below.

This is where our magical switches are hiding. Each option is briefly described, but it’s far from thelling the whole story. Each feature requires some amount of configuration and setting up to work properly. And while everything is described in documentation, there are some things that really surprised me.
To best illustrate what will be the effect of enabling the features, I needed a playground.
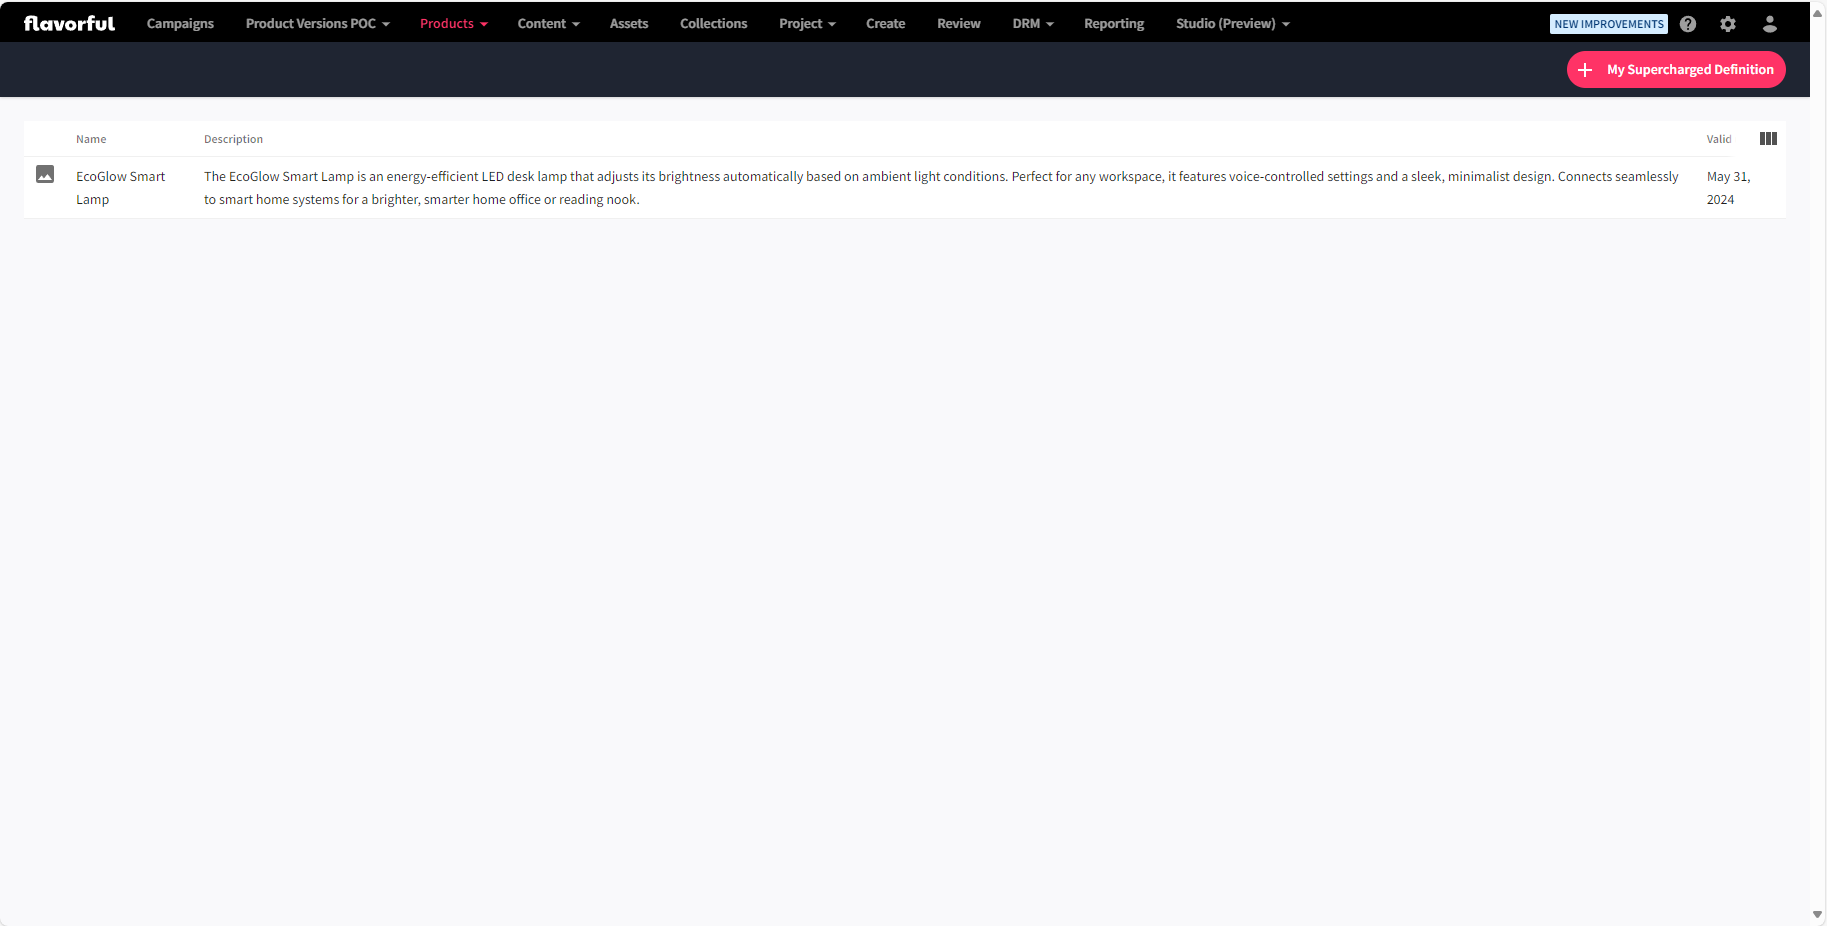
For the purpose of writing these articles, I have created a simple entity definition, which I’m going to gradually supercharge. Initially, I created a page with bare list of the entities, on which I can do some basic operations such as delete or edit them.
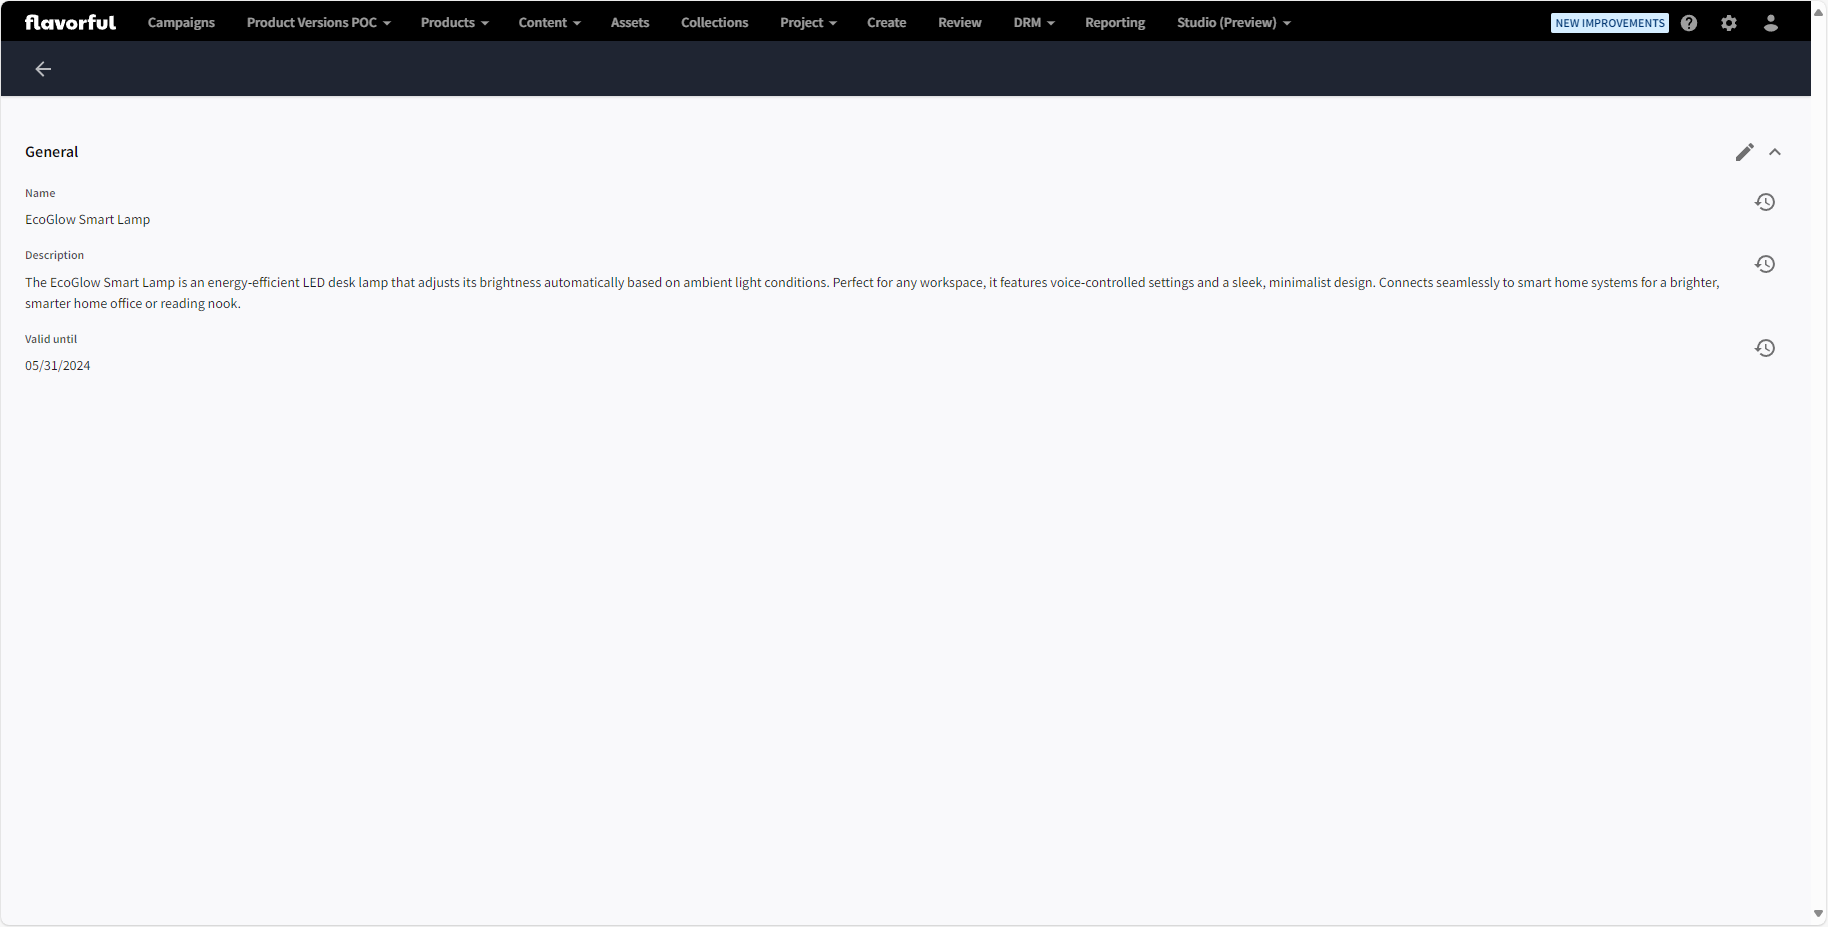
I also had to create a simple details page, which is required when creating new entities and viewing the details of the existing ones.
I will use these pages to add components which will become available, as I will be enabling new features.
State Flow
As I menioned, I decided to start with State flows feature. It is actually just another name for a good old workflow. It can be applied to any definition.
Enabling State Flow
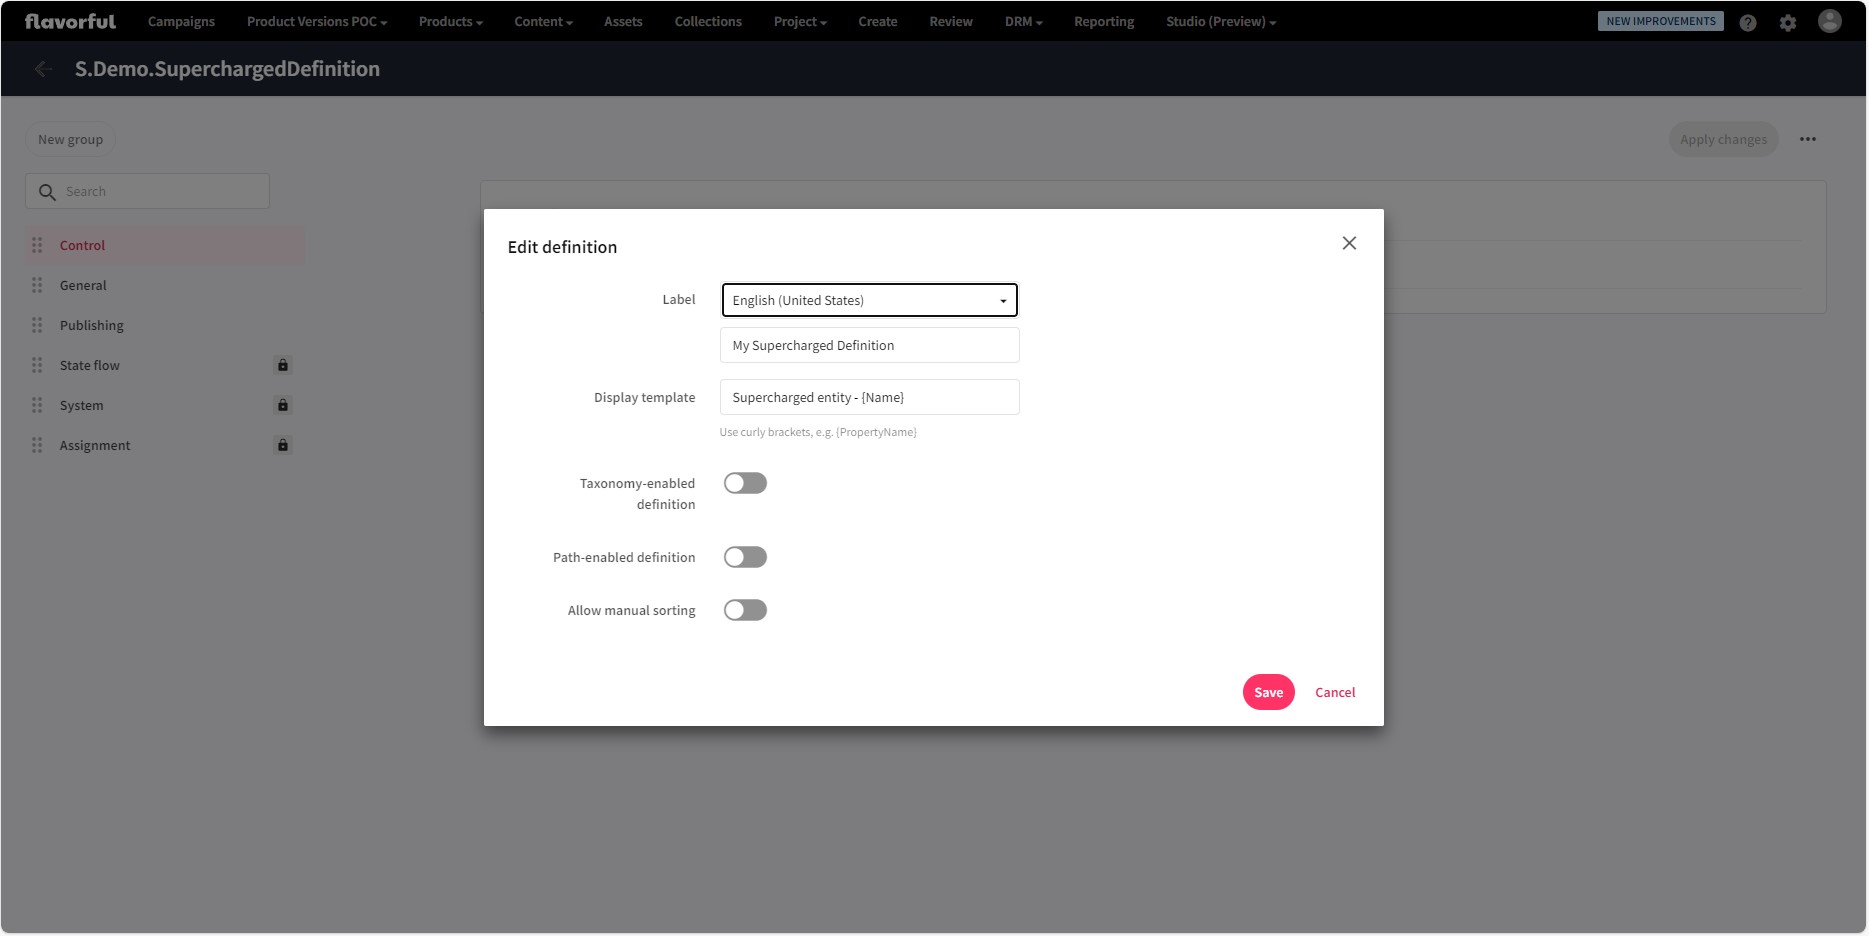
Before you enable State Flow, go to the entity settings and set a Display Template. The Display Template is used to represent your entities instead of entity ID and usually uses one of the fields in the curly brackets. Because it is a template, you can combine more fields and also add some text if needed.
Once the Disaply Template is set up, go to Enable/Disable pop-up and switch the State flow switch. There are three configuration options available.
Enable assignees - enables an option, to configure what to do with the assignees during the state flow transition. When set to true, on every transition in the state flow configuration, there will be additional option Update Asignees available.
Detail page - this one is straightforward and well explained - it’s a page used in notification email template.
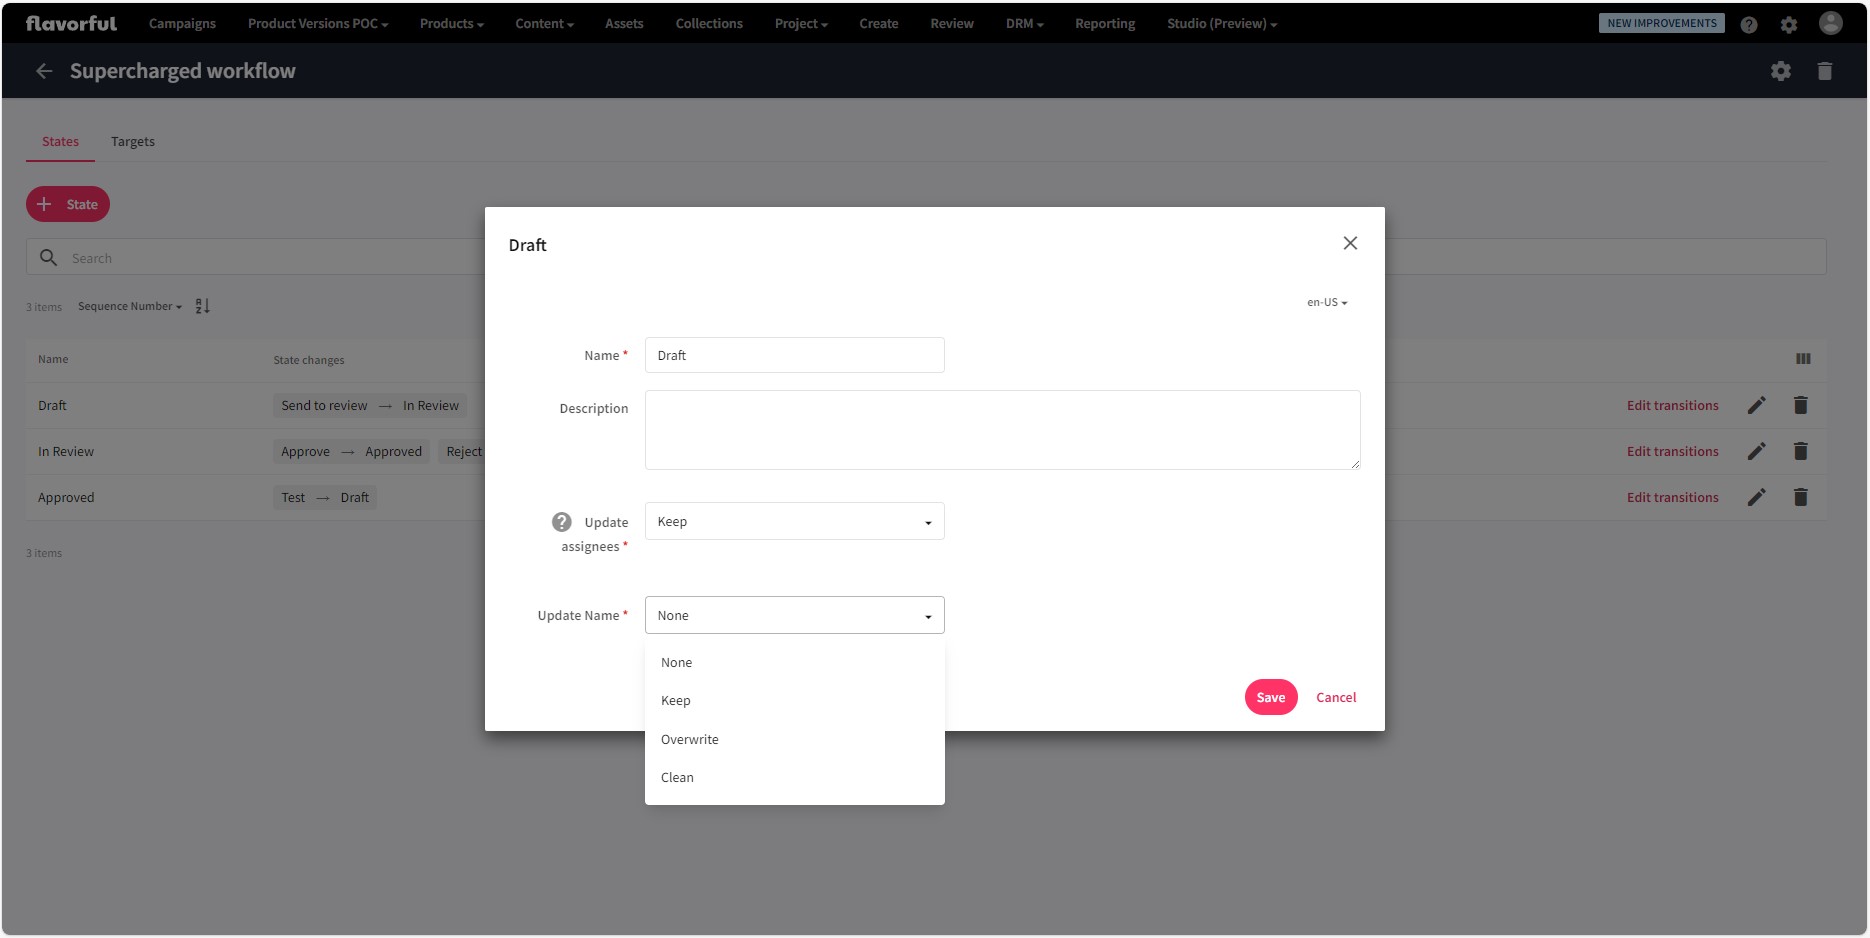
Fields - allows you to add additional fields, for which one of three actions - Keep, Clean and Overwrite - can be selected in each transition. It works in similar way to Enable assignees but for other editable fields.
Eg. Field Name is selected.
In every transition in the state flow there will be additional Update Name option available. This option allows you to choose what happens with the Name field when product reaches the state.
What happens
Let’s now see what actually happens when the feature is enabled.
Entity definition gets new relations:
- EntityNameToStateMachine
- EntityNameToAvailableRoute
- EntityNameToActiveState
- StateUserToEntityName
- AssignedUserToEntityName
- AssignedGroupToEntityName
In the operation component two operations are now available
- Assign state flows - allows to select one of the state flows compatible with current definition
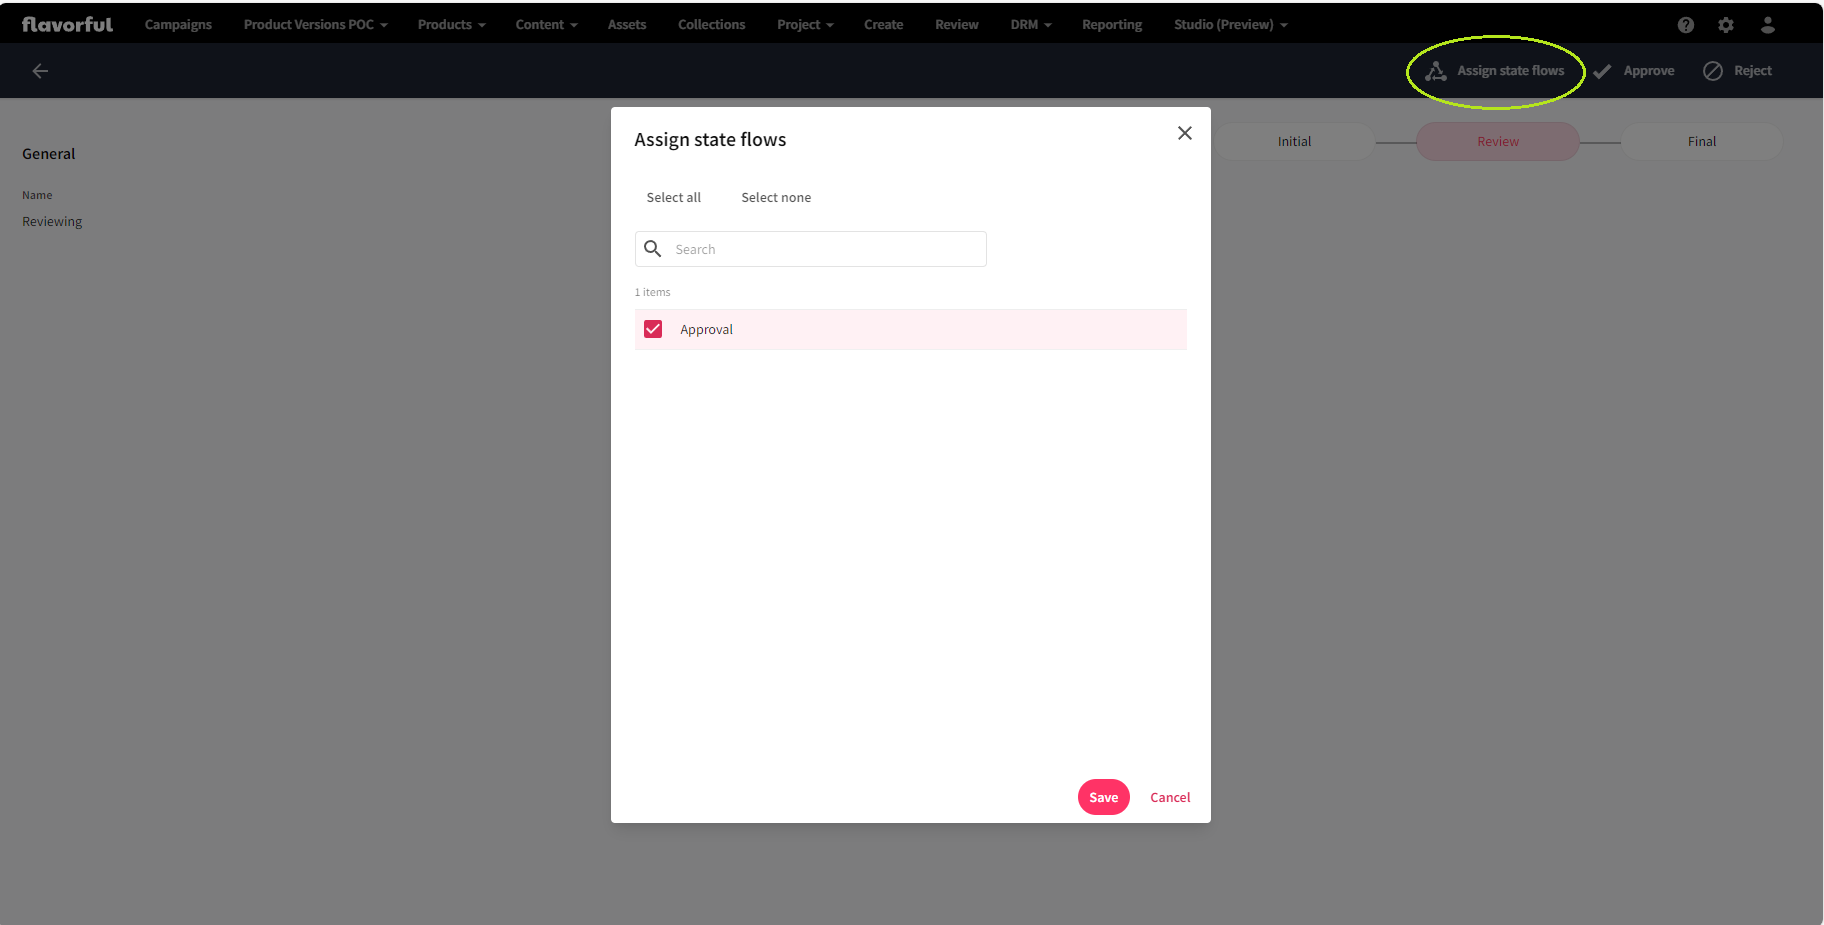
- State flows transitions - allows to use one of the existing transitions
You will be able to create a state flow connected with this entity definition.
Creating state flow
Once the entity is enabled to use state flows, a state flow has to be created. State flows are bound to the entity definition and each state flow can only work with one entity definition. It means you have to enable the feature for the entity definition before you can create state flow for it.
In order to create new state flow:
- Go to the State flows page in the Manage section and click on a + State flow button.
- A target definition has to be selected for which the state flow can be used. Only enabled definitions are listed, so there is no risk of selecting incompatible one.
- On top of that, new state flow requires a name.
- Detail page and Email template are optional and are quite well explained when hovering over the question mark.
States
State flow obviously needs states. To create a state click on the + State button on the state flow page. It will open following dialog and will reqruie to provide some data for the state.
Name and Description - quite self explanatory
Update assignees - This option is only available when it was enabled when configuring the State flows featuch in the Enable/Disable pop-up. It controls what happens to the assignees when the state is reached. When Overwrite is selected it is possible to define either static users/groups by name or dynamic asignees/assignee groups.
Dynamic assignee groups is an interesting concept here, which is not explained clearly in the documentation. I couldn’t figure out how it works yet, but this is definitely on my TODO list.
Transitions
Transitions define how the state flow progresses from one state to another. Transitions are created for each state, and state can have more than one transition. For example, state In review can either have Accept transition, which will progress to the next state, or Reject transition, which will move it back to one of the previous steps.
- On the state flow page, click on the Edit transitions button on the state for which you want to add or edit transition.
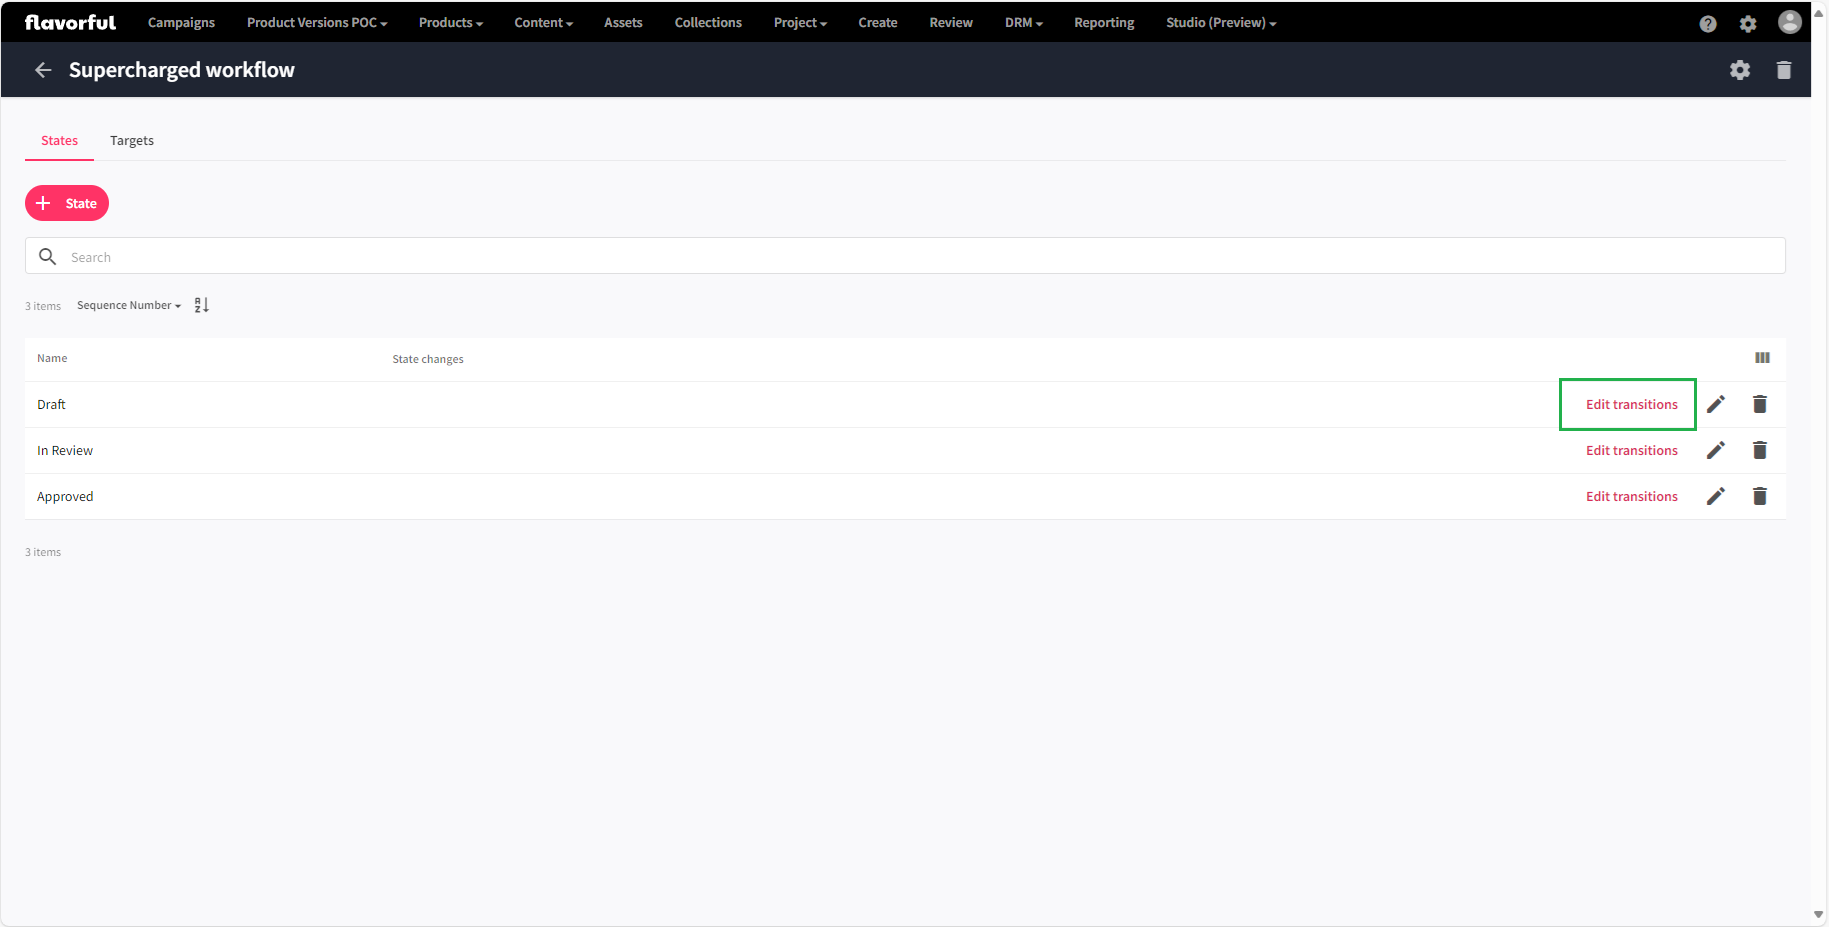
- The state for which the transions are being edited can be found in the title of the dialog.

- Click on + Transition button.
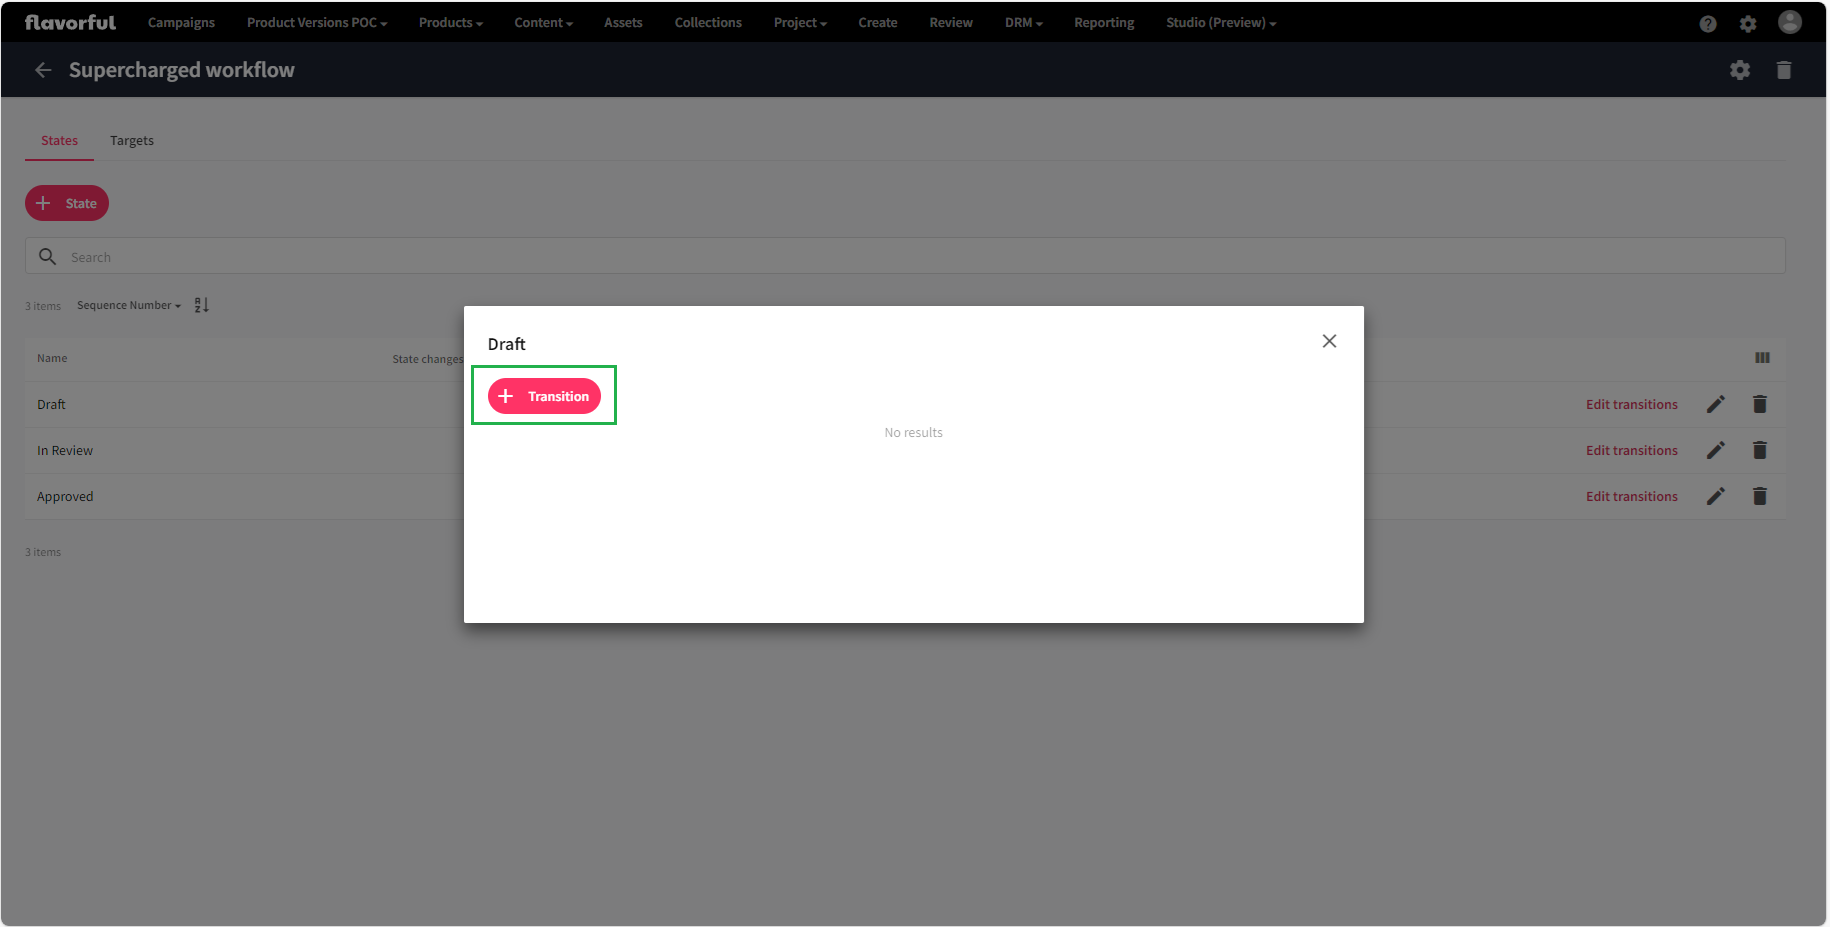
- Provide a Name, choose an Icon and select Next state for the transition.

- Save and repeat for other transitions.
Using state flow
When state flows feature is enabled it will not have any immediate effect on the entities. Old entities will remain unchanged and new entities will not get the state flow assigned automatically.
To ensure all new entities will get the state flow assigned, we will need an action and an appropriate trigger.
- Go to the Manage page and click on Actions
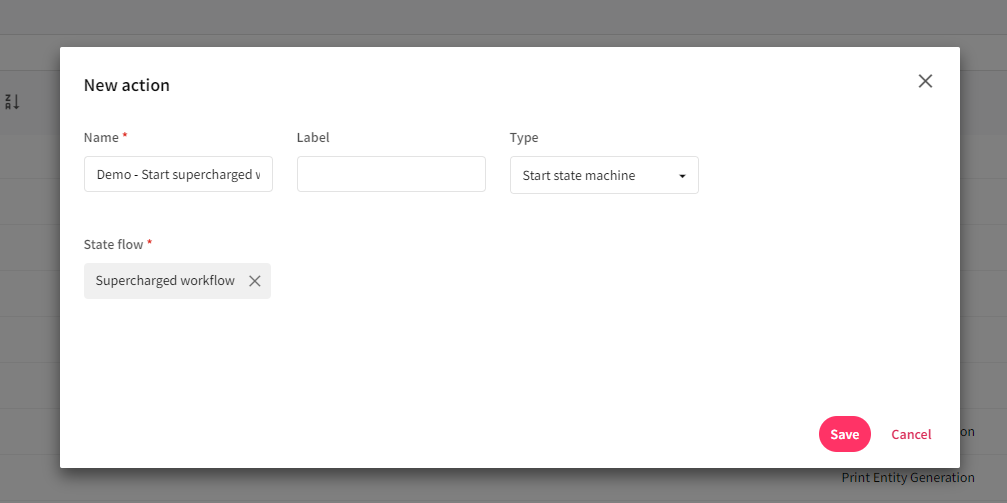
- Create new aciton
- Provide a descriptive name
- In the Type field select Start state machine
- Select appropriate State flow.
- Go back to the Manage page and click on Triggers
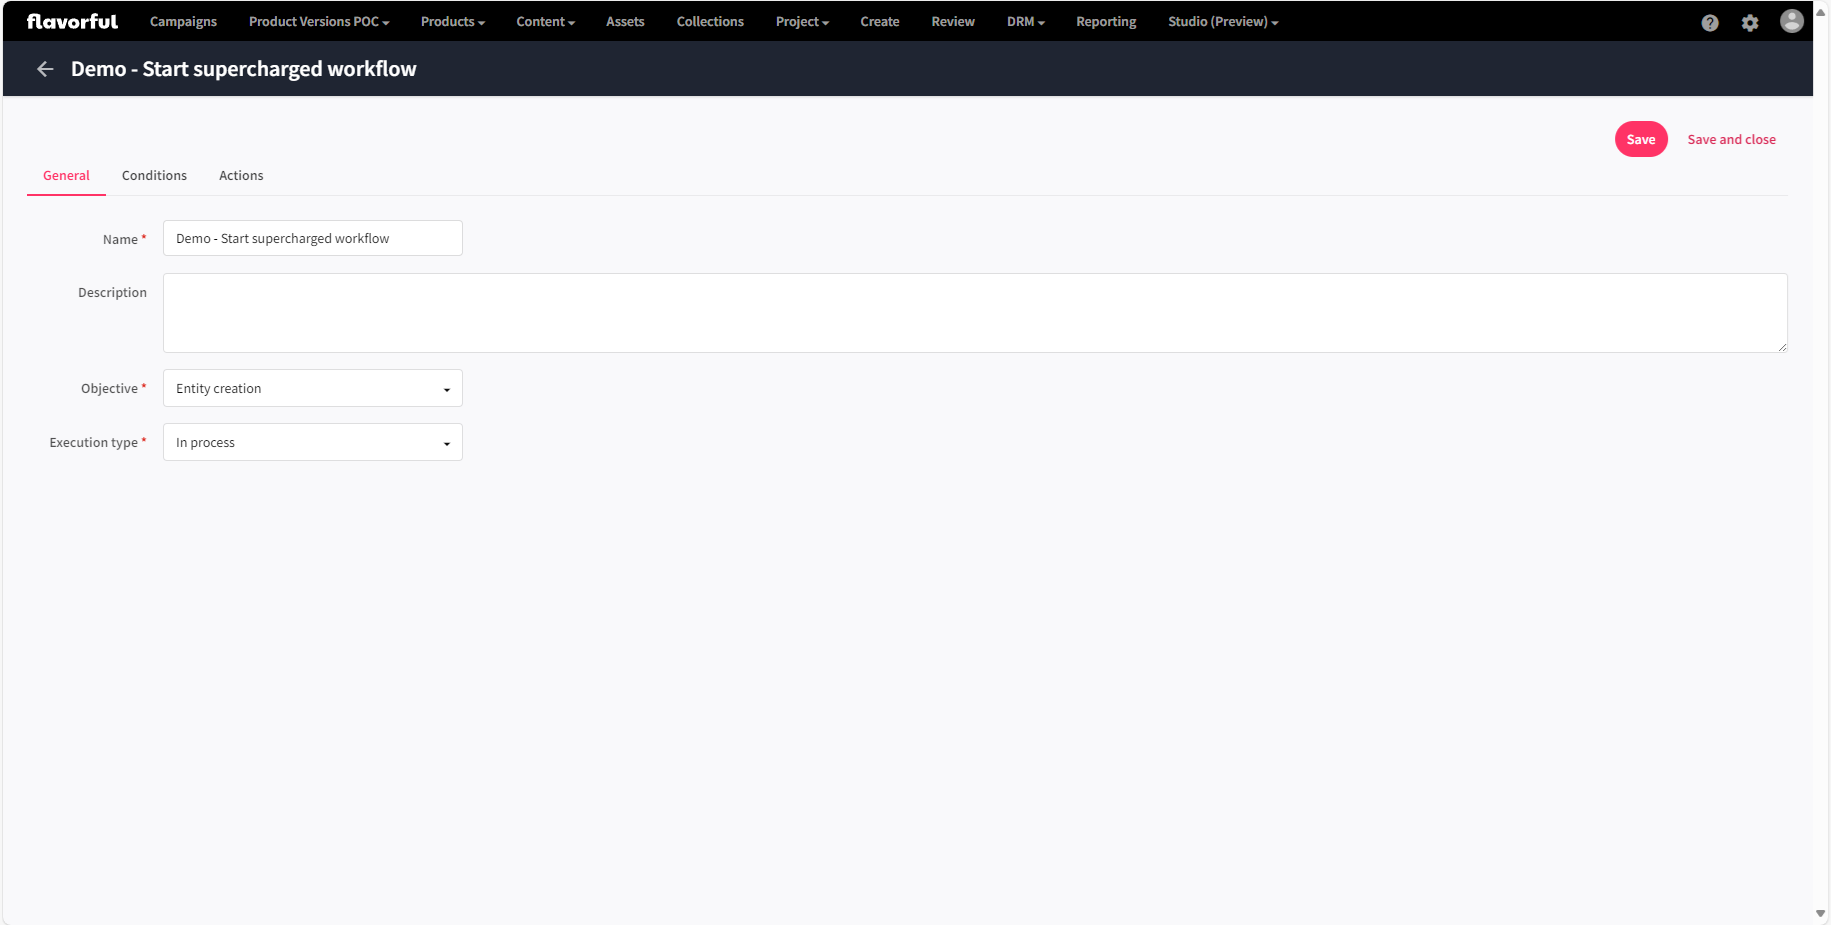
- Create new trigger
- Provide a descriptive name.
- The Objective set to Entity creation.
- Execution type set to In process.
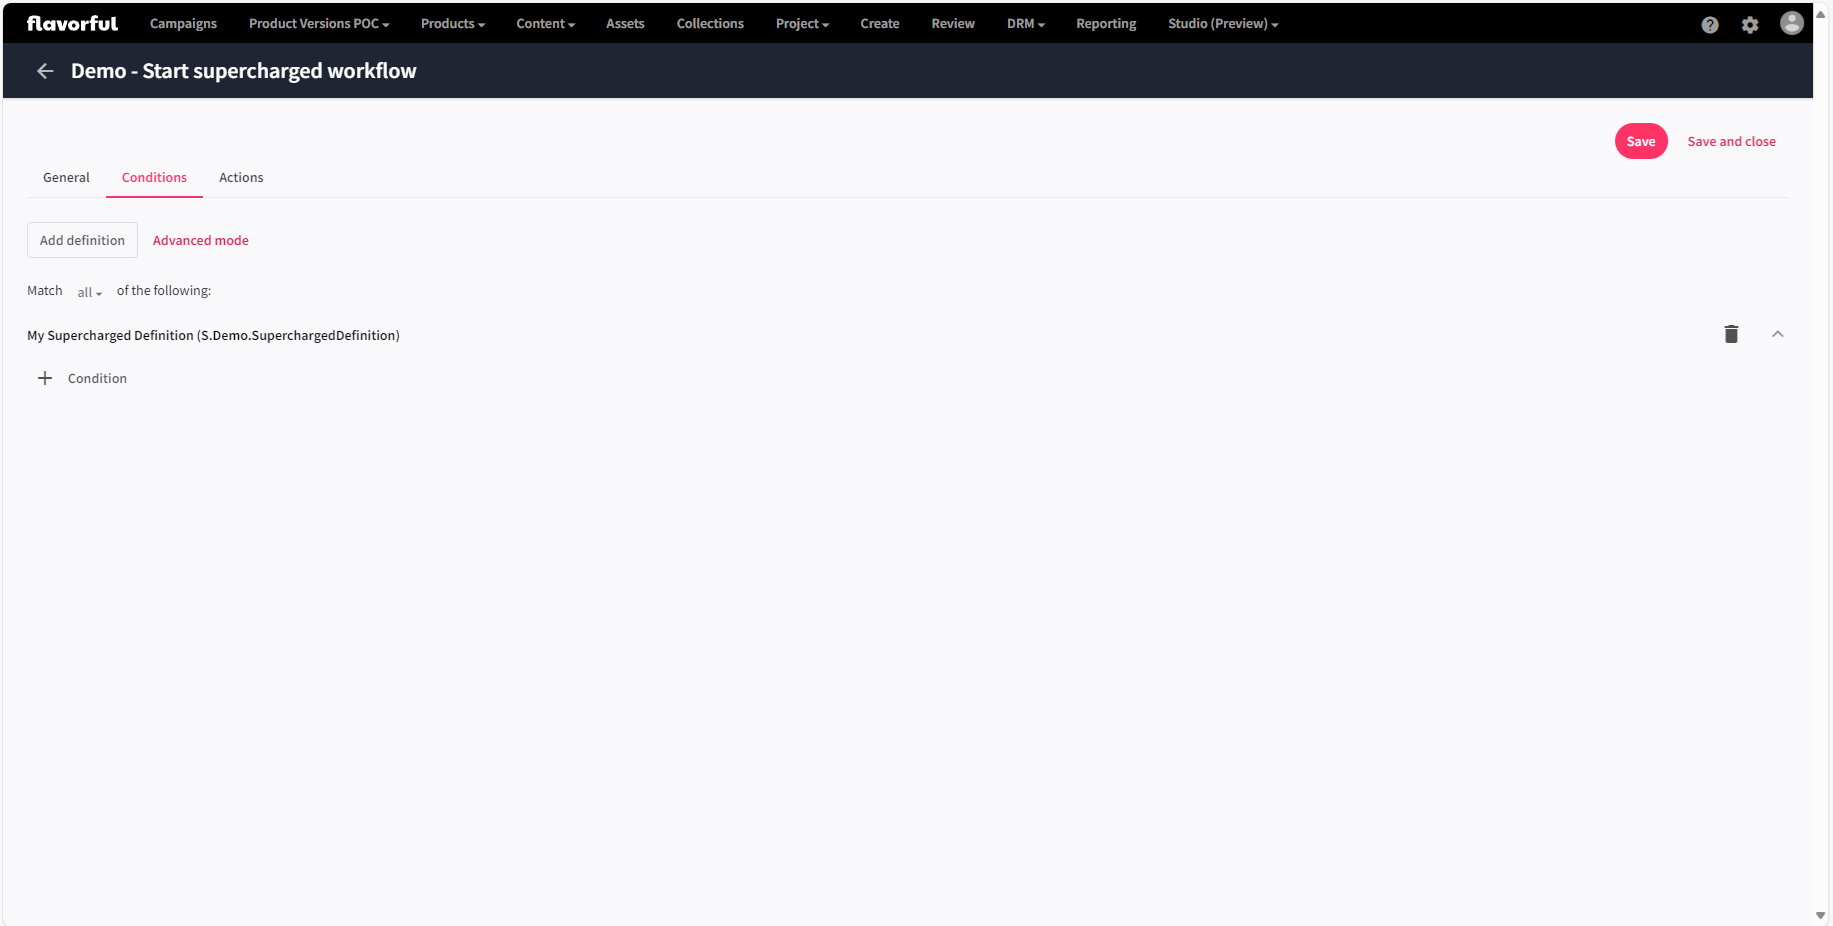
- On the Conditions tab, select your entity definition for which you want to start the state flow.
- On the Actions tab, select the action created in step 2, in the Post actions group.
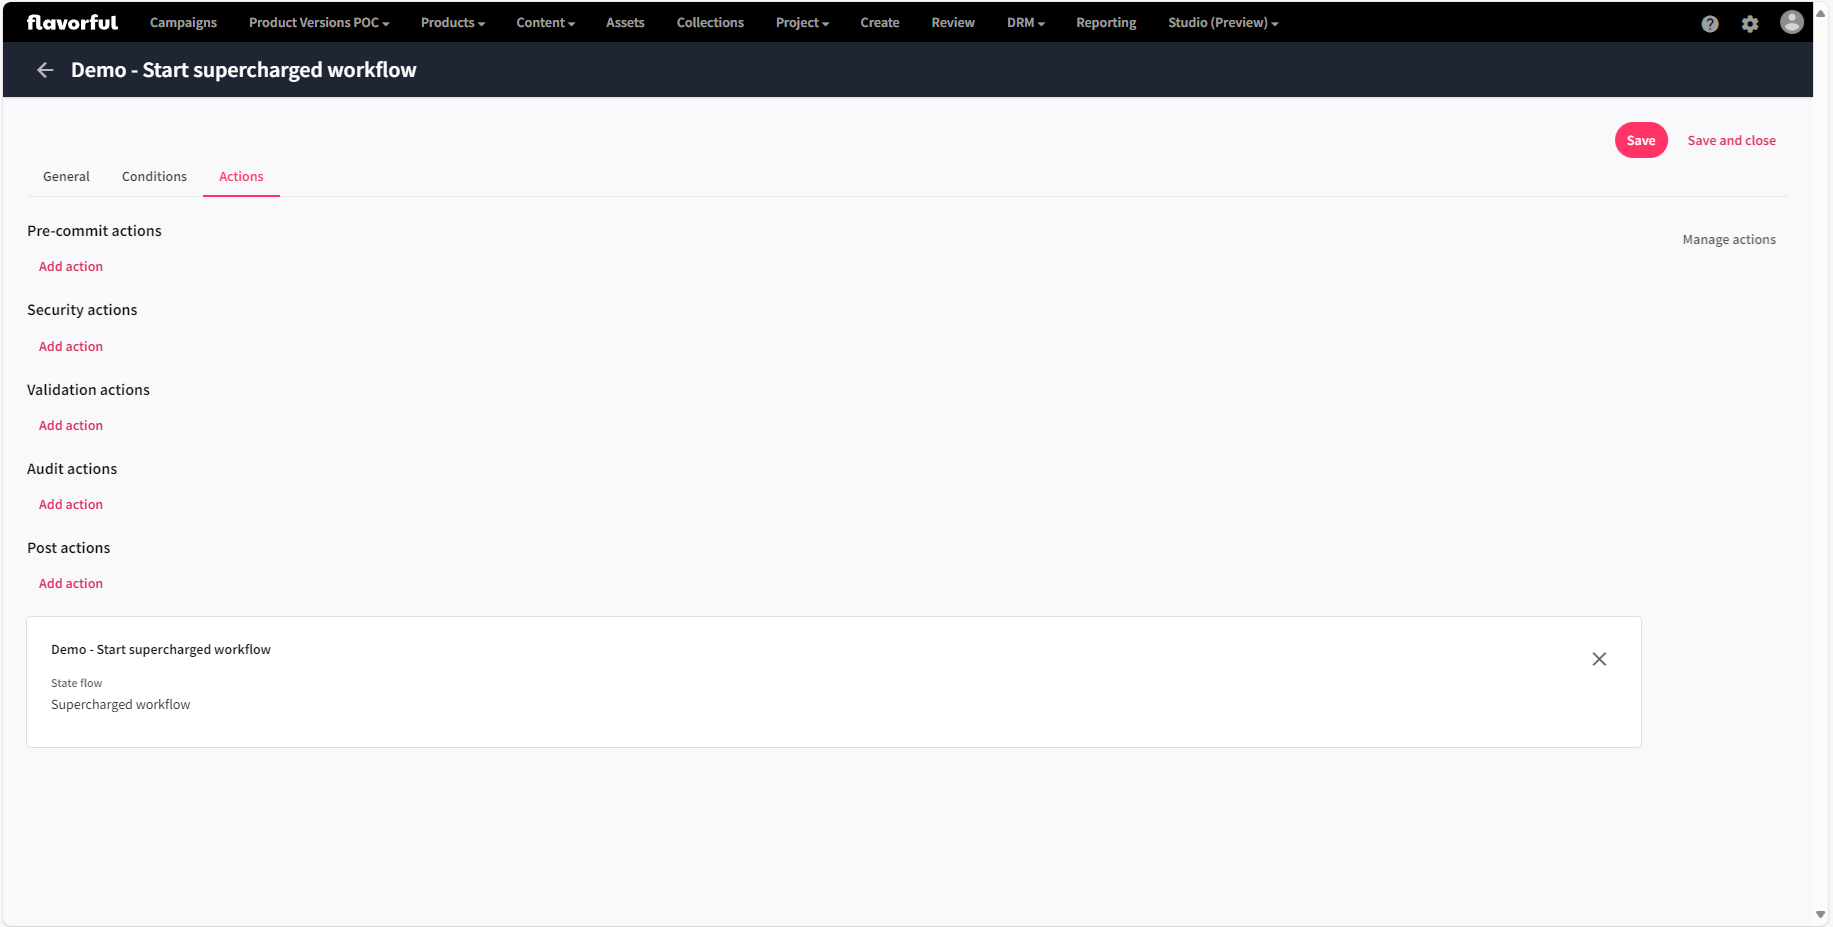
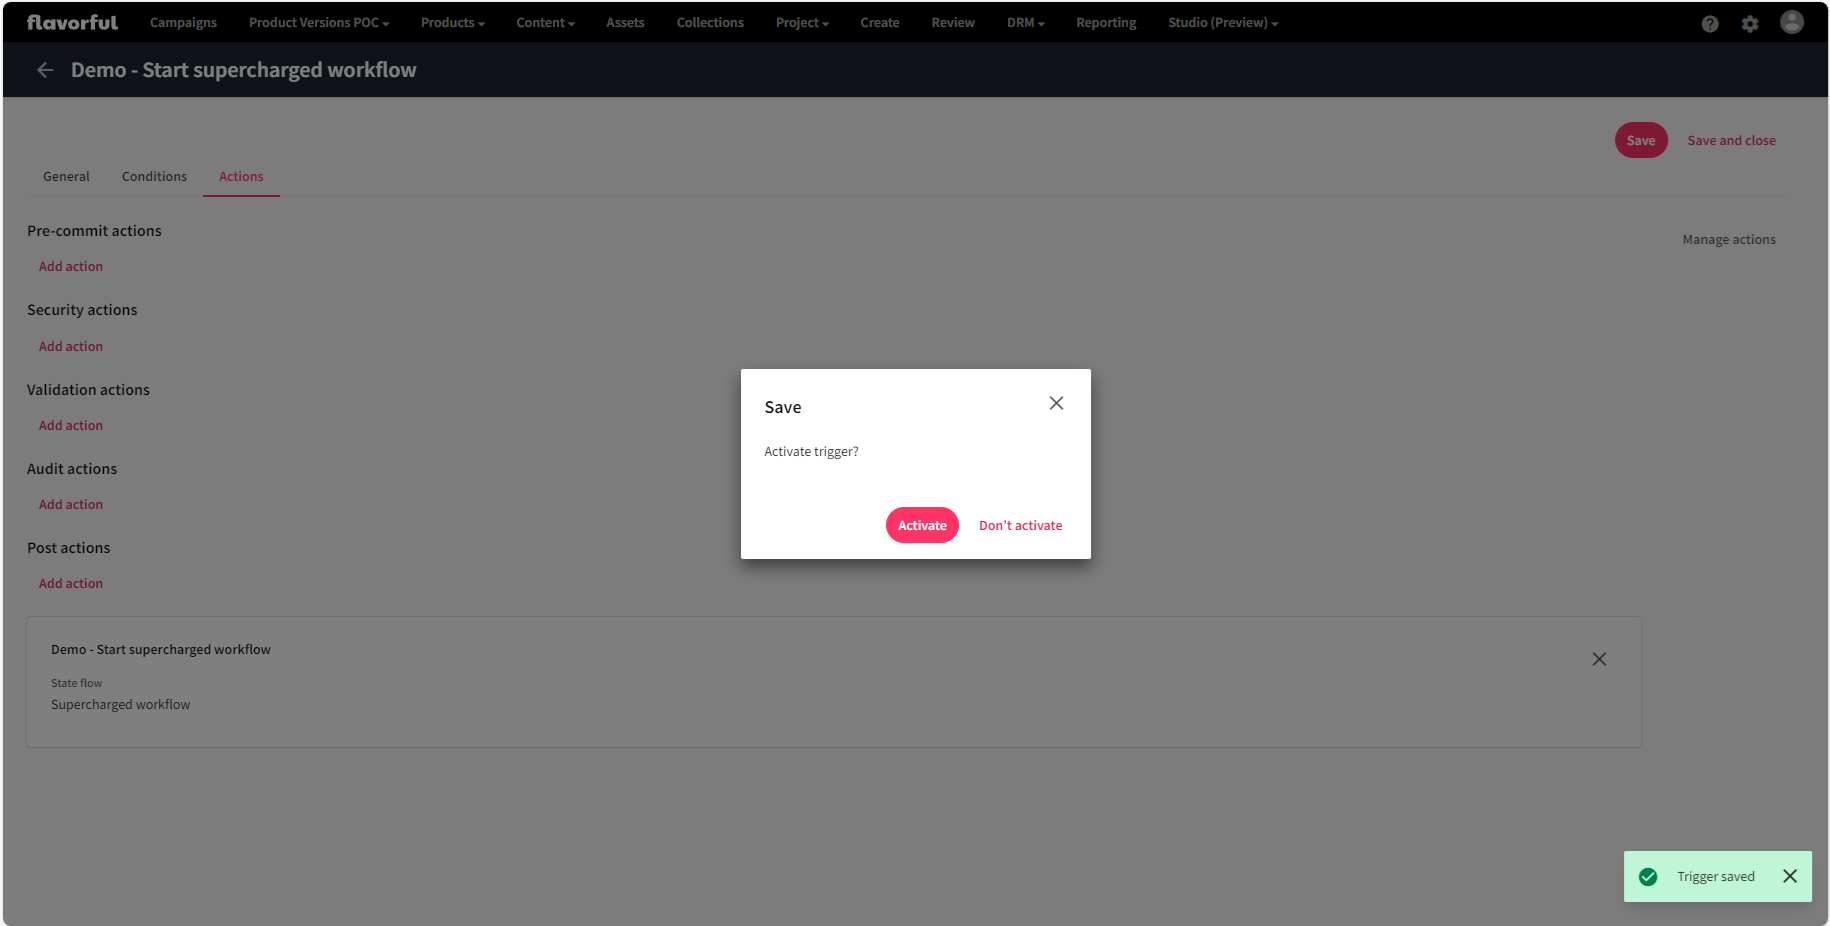
- Save and close the trigger page and when asked to activate the trigger, select option to activate it.
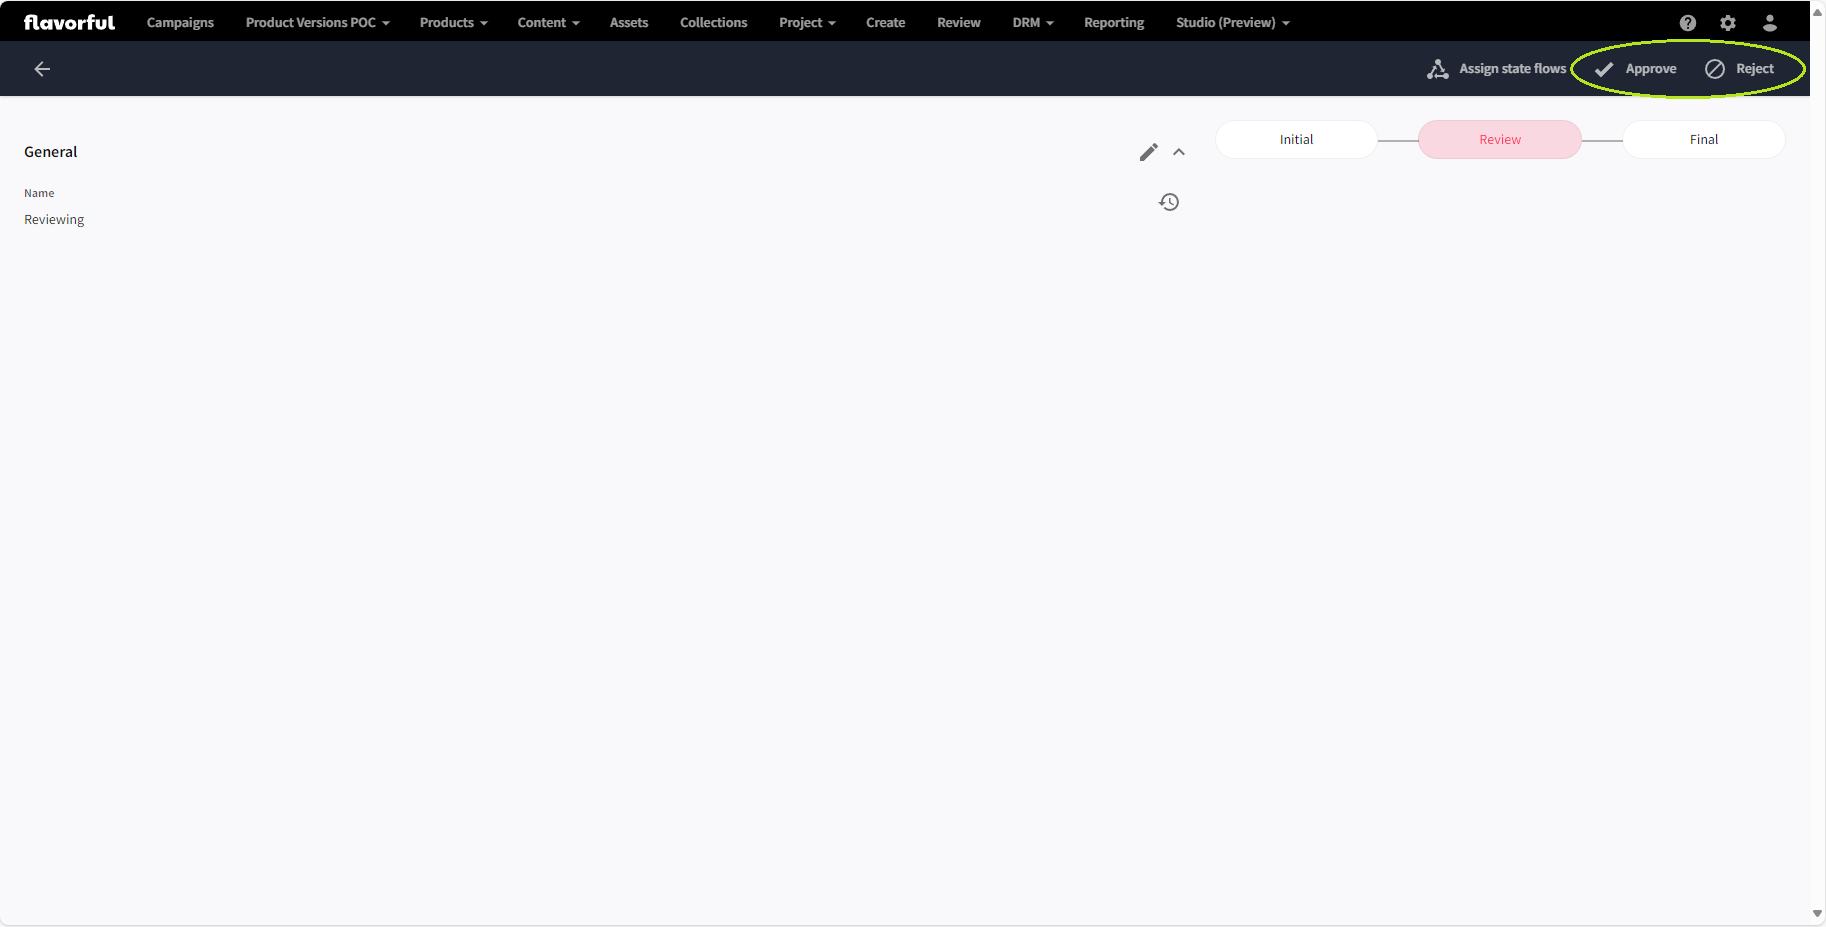
The buttons to progress the entity in the state flow have to added manually. This can be done on the details page using Operations component or on the Search component when configuring the view.
How about existing entities
Depending on how many items require updating this can be done in at least two ways:
- Update the relations using Excel
- Write a small application that will go over the entities and update them
This article grew quite a lot, so I will write a separate article just to cover this topic.
State flows and languages
If you store your content in multiple languages, within the same entity, you have to remember that state flow transitions will affect all of them. By only enabling state flows, it is not possible to have the same entity in different states for different languages. It means that if the entity is approved, it is approved for all languages. When it is rejected, it will be rejected for all languages.
In order to have separate state flows for each language, another switch needs to be enabled. But this is a material for another blog post.
Disabling state flows
Be careful when disabling state flows.
The message says you will loose the data and this is correct, however not everything will be cleared.
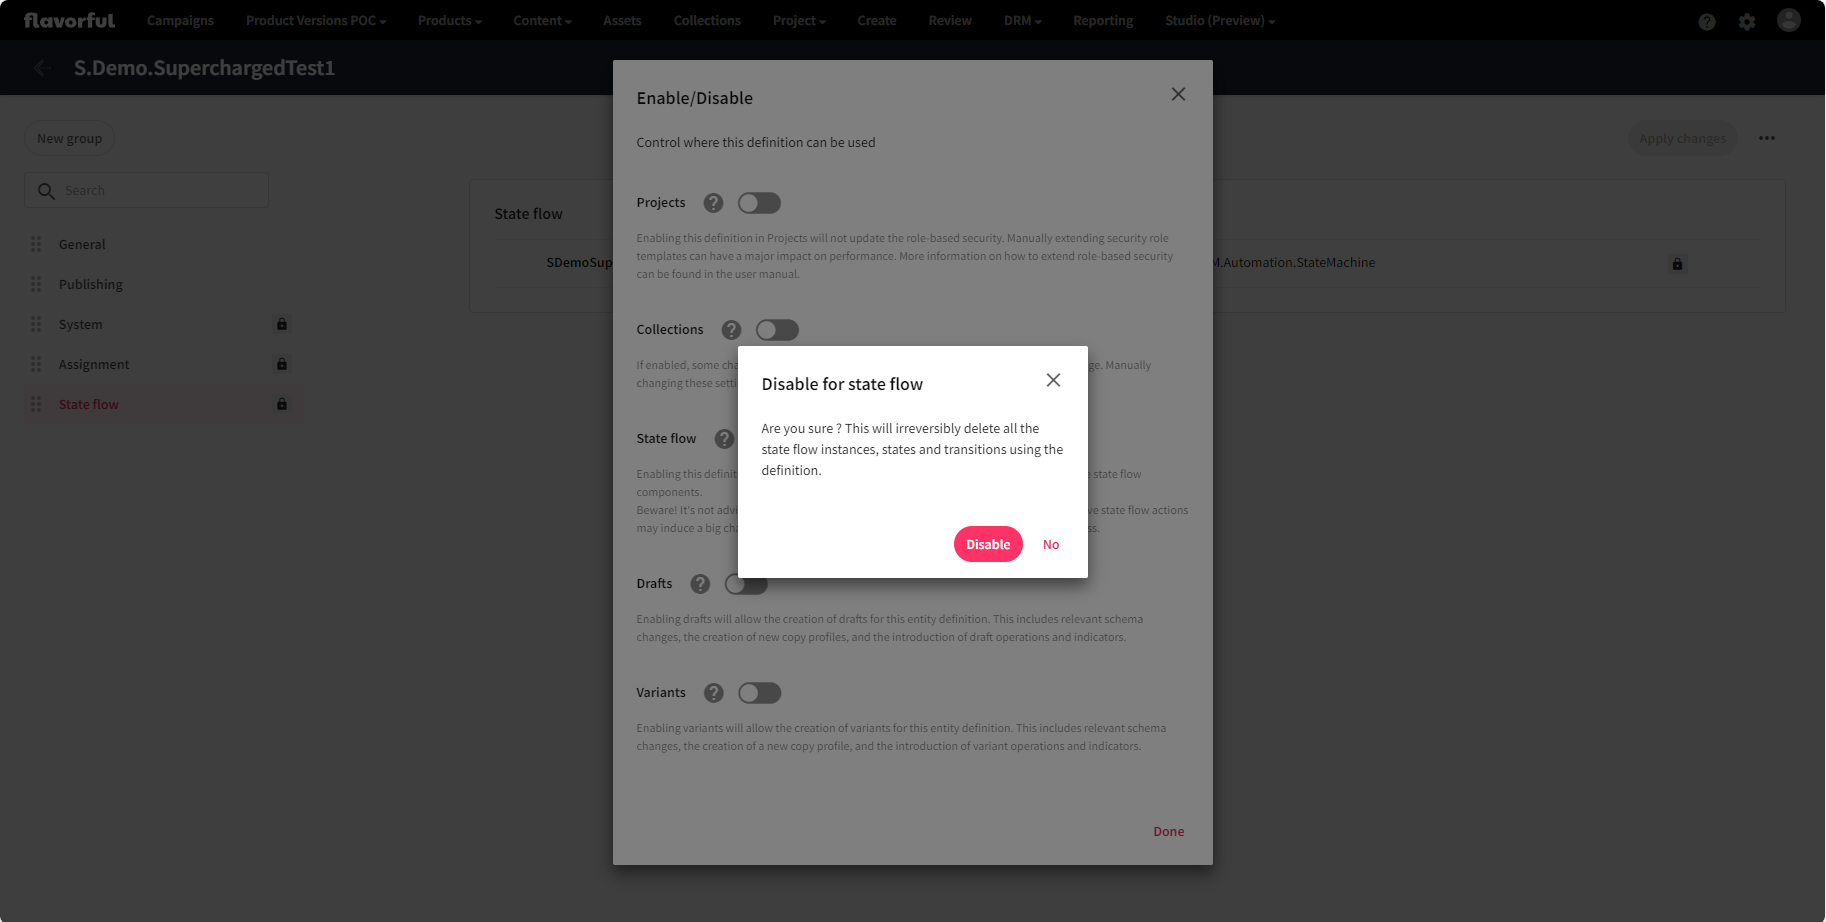 Few relations related to assignement will stay.
Also on the operations component the state flow related operations will not be removed.
The page with this component will be operational but will produce an error.
Few relations related to assignement will stay.
Also on the operations component the state flow related operations will not be removed.
The page with this component will be operational but will produce an error.
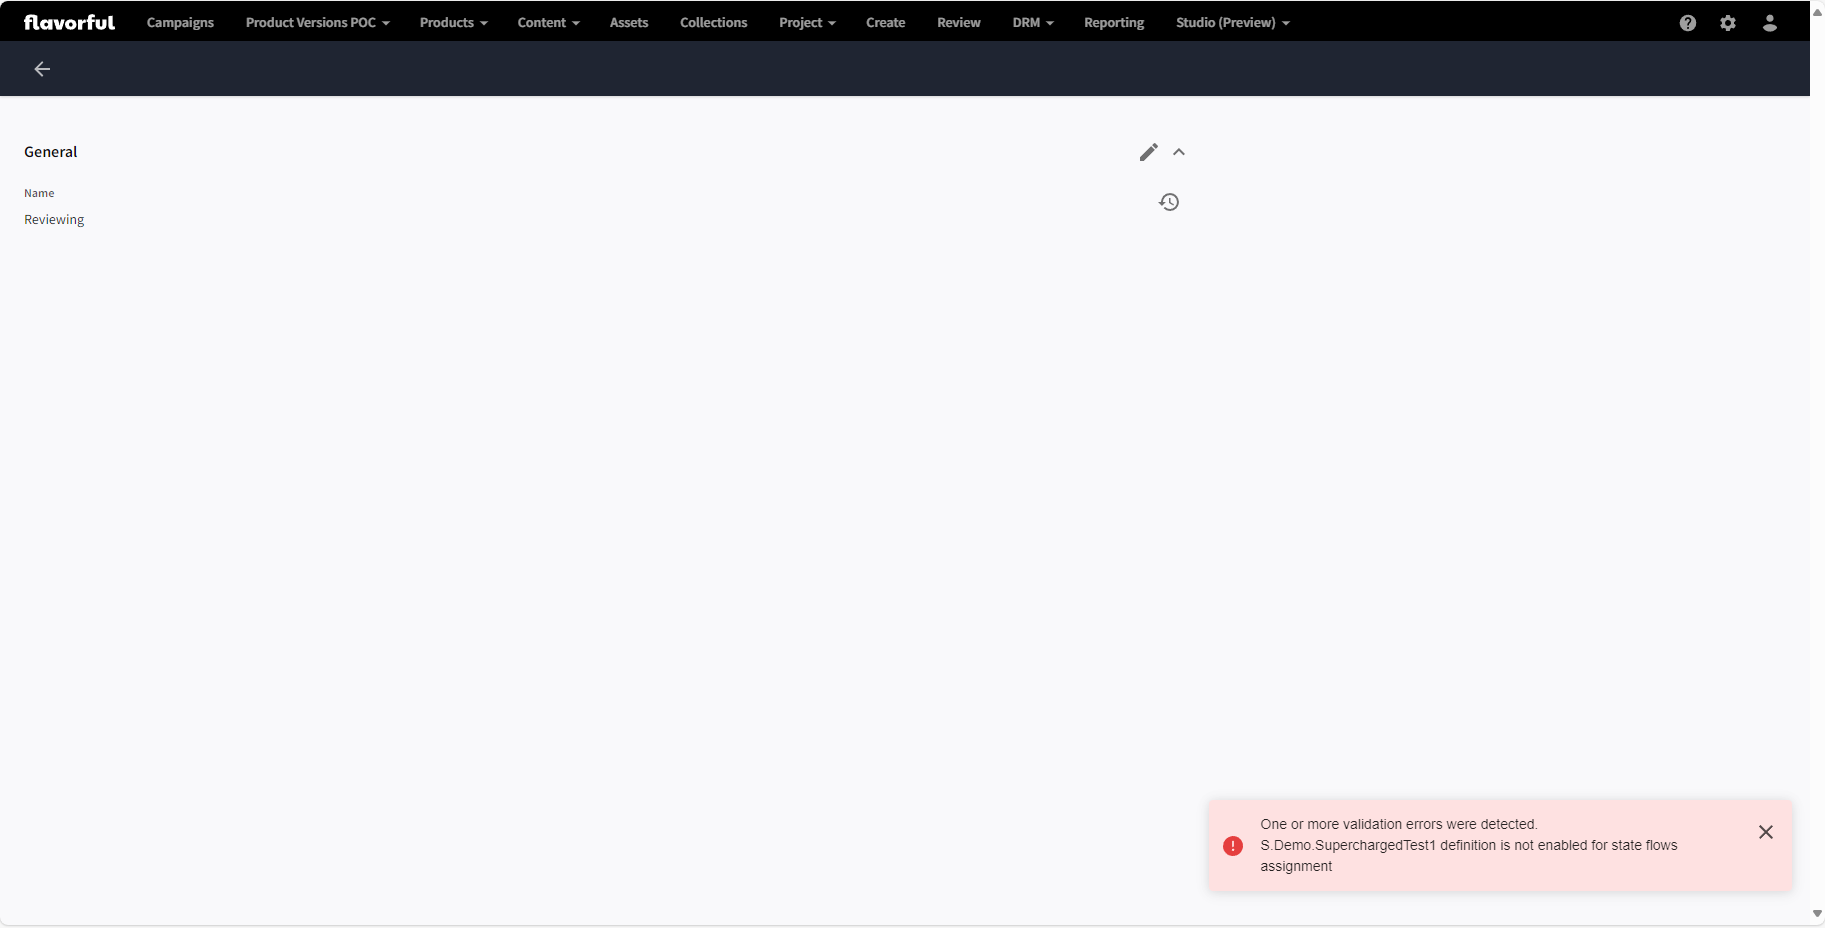
You will however loose all state flow definitions that were related to the eneity definion that the state flow is being disabled.
Useful links
Conclusion
Stateflows are really powerful and useful feature. I hope this little article will help you with the configuration and getting started with it.